
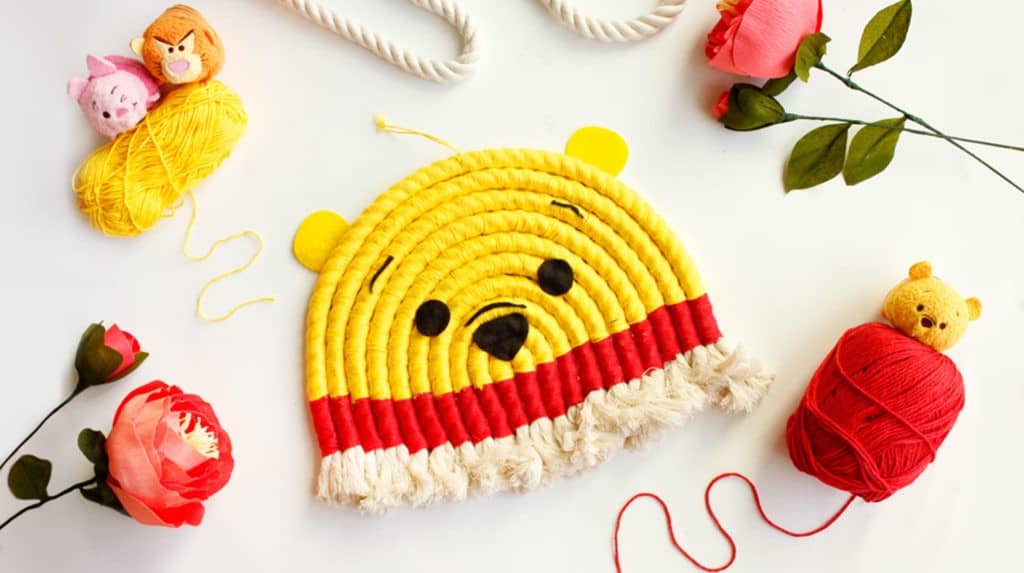
There are many words to describe Winnie the Pooh. He is positive, friendly, cheerful, and as sweet as hunny. DisneyFamily shares a DIY that will bring Pooh’s bright energy into your home decor. This DIY macramé wall hanging, inspired by our favorite silly ol’ bear, is easy to put together and will hopefully make you smile every time you see it. Keep reading to learn how to make this jolly craft!
What You’ll Need:
- ½ to ¾–inch rope
- Floral wire
- Hot glue gun
- Black felt
- Yellow felt
- Red yarn
- Yellow yarn
- Masking tape
- Scissors
How To Make It

1. Form a half circle with the rope by arching the rope back and forth. The rope should loop between each arch at the bottom of the semi-circle.
Bonus Tip!
BONUS TIP: Consider planning and booking your next Disney trip with an Authorized Disney Vacation Planner you can trust like Mickey Travels. They’ll help you get the best Disney travel deal, share expert advice and their services are totally FREE! It’s genius! Discover More >

2. Cut the rope on the loops between each arch. Add masking tape to the ends to keep the rope from unwinding prematurely.

3. Cut pieces of floral wire to match the length between the taped ends of each piece of rope. Arch the wire pieces to match the ropes’ arches. This is to hold the arches’ shapes.

4. Use the hot glue gun to glue down the wire to the rope.

5. Now it’s time to wrap the yarn around the rope! With the red yarn, start at one end and tie a knot. Wrap the red yarn tightly around the rope to not leave any gaps. Keep wrapping until you are about ¼ of the way up the semi-circle. Tie a knot and cut the tail. Repeat on the other end of the rope.
6. Continue to wrap red yarn on the ends of the rope, stopping when the red yarn hits ¼ up the semi-circle. It helps to keep the ropes in the semi-circle form to reference so you know when to stop wrapping.

7. Once all the ropes have red ends, wrap the yellow yarn around the rest of the ropes.
8. After each arch is fully wrapped, remove the masking tape and unravel the rope.
9. In the middle of the top arch, tie a loop with yellow yarn. This will be what hangs the piece to the wall.
10. Form the semi-circle again and hot glue the ropes together.

11. Cut out shapes for Pooh’s eyes and nose out of black felt. Cut out shapes for Pooh’s ears out of yellow felt. Glue those onto the semi-circle.

12. Hang on your favorite wall. You’re done!
Notes: All cutting and hot gluing should be done by an adult.
Source: DisneyFamily


