
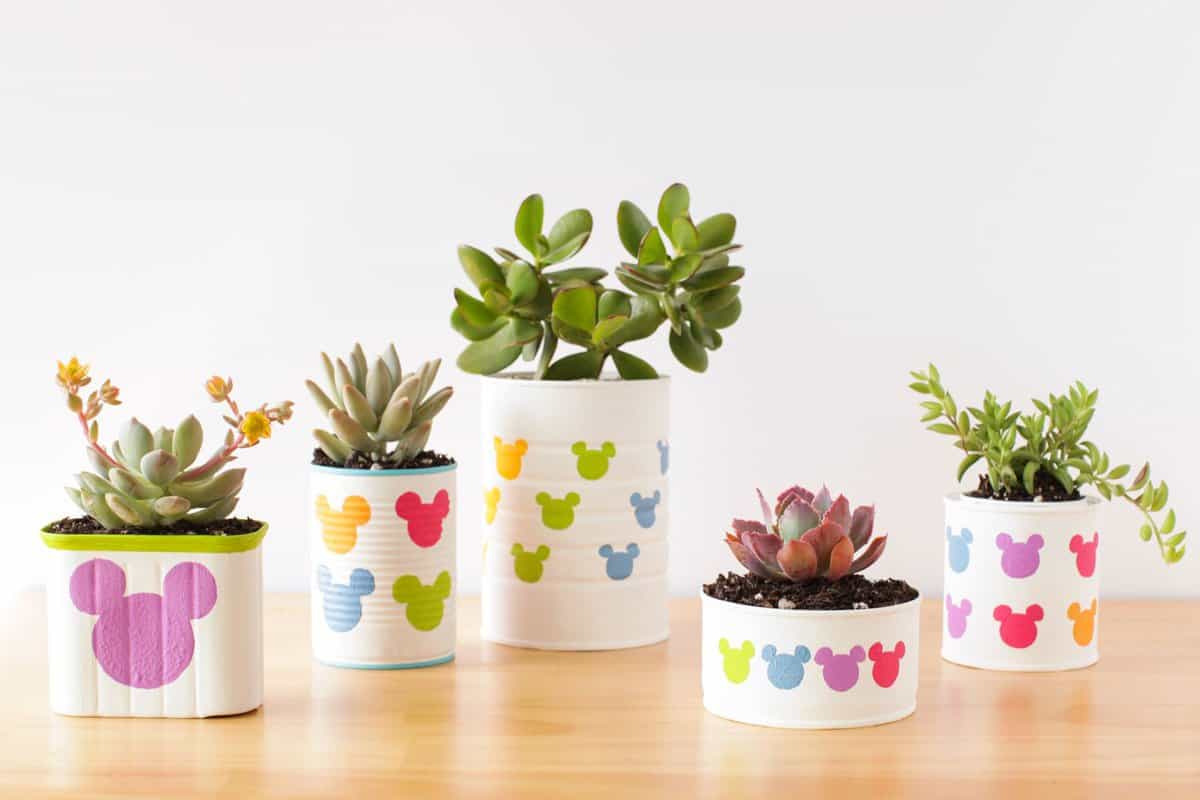
Bring a little pop of color to your garden… Disney style! The best part is to make this DIY project work, you’ll be using repurposed tin cans! Thanks to Family.Disney.com, it’s an easy and fun project that the whole family can get involved in. Get creative, and happy gardening!
Tin Can Mickey Mouse Planters
What You’ll Need:
- Empty tin cans, washed and dried
- Small towel
- Hammer
- Nail
- White acrylic paint
- Paint palette
- Paintbrushes
- Pencil
- Measuring tape
- Washi or painter’s tape
- Foam daubers in a variety of sizes
- Acrylic paint (Choose your favorite colors!)
- Soil
- Small plants, such as succulents
- Gravel (optional)
How To Make It:

1. Place a folded towel under an upside-down can. Use a hammer and nail to create 3 small holes at the bottom of each can.

2. Paint the cans with white paint. You may need a few layers to get the color to look solid. Allow the paint to dry completely. Note: if there are any sharp edges inside the can, you will want to completely cover them with tape before painting.

3. Use a pencil and measuring tape to lightly mark evenly spaced dots for creating a uniform Mickey pattern. For Mickey faces 1-inch or less, it’s ideal to mark each dot 2 inches apart. To create a colored band around the top or bottom edges of a can, use washi tape.

4. Use foam daubers and colored paint to impress Mickey faces and ears onto the tin. For example, use a ¾-inch dauber for his face and a ½-inch dauber for his ears. Allow the paint to dry completely. If needed, use a small paint brush dipped in white paint to “erase” any errors made with the colored paints.

5. Fill a finished planter with soil until almost full. Insert a small plant in each can and fill any empty space with more soil. Optionally, top the soil with gravel.

6. Create a variety of planters in different shapes and sizes, and enjoy watching your plants thrive!
Note: Be sure to secure tape over any sharp edges inside the tin can before painting.
Source: Family.Disney.com


