
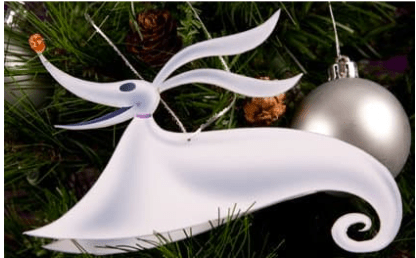
As you prepare your tree for Christmas Town this year, don't forget to add a little from “The Nightmare Before Christmas”. Disney Family shares this DIY Zero Ornament that is adorable and fun.
What You’ll Need
- -Regular paper or cardstock
- -Scissors
- -Glue or double-sided tape
- -String or ribbon
Bonus Tip!
BONUS TIP: Consider planning and booking your next Disney trip with an Authorized Disney Vacation Planner you can trust like Mickey Travels. They’ll help you get the best Disney travel deal, share expert advice and their services are totally FREE! It’s genius! Discover More >
How To Make It
- Print the ornament on regular paper or cardstock and cut out the pieces.
2. Starting with one half of Zero, fold the bottom piece up and the ear down, then use glue or double-sided tape to secure the pieces to the back side of Zero’s body so the design is two-sided. Repeat this step with Zero’s other half.
3. To fit the two halves together, place one half face down on a work surface. Spread glue over the back of Zero’s face, spine, and tail. Fit Zero’s other half on top of the glued surface and hold in place until the two halves are stuck together.
4. Gently open the front folds where Zero’s “paws” are to make a tent formation. Punch a small hole in Zero’s back, thread a string through the hole, and tie the string to form a loop.
Now you can hang Zero on your tree and have a little magic from “The Nightmare Before Christmas”.
Source: Disney Family

