
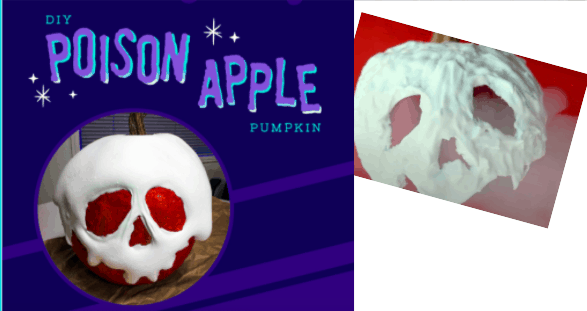
Looking for a spooky pumpkin design this Halloween? Try out Disney's DIY Poison Apple Pumpkin. This creative pumpkin is a unique way to bring a little Disney to the season.
What DisneyParksBlog says you need:
- -pumpkin (real or fake)
- -Red paint
- -Paint brushes
- -Shaving cream
- -White Glue
- -Printed template (cut out)
- -Pencil or marker
- -Mixing bowl
- -Spoon
- -Optional: Various shades of red paint
Directions from DisneyParksBlog
Step One: Paint your pumpkin red. Use a mix of metallic red and dark red fora more realistic look. Let the pumpkin dry completely.
Step Two: Use the template to trace the face onto the pumpkin with a pencil or marker. This is the area you want to avoid putting any o the foam mixture on.
Bonus Tip!
BONUS TIP: Consider planning and booking your next Disney trip with an Authorized Disney Vacation Planner you can trust like Mickey Travels. They’ll help you get the best Disney travel deal, share expert advice and their services are totally FREE! It’s genius! Discover More >
Step Three: Mix together equal parts of the shaving cream and white glue. Once mixed, add a bi more white glue to the mixture for longer lasting foam.
Step Four: Use a spoon and your hands to drip blogs of the mixture halfway down the sides of the pumpkin, being careful to avoid the face you drew. Fill in any small gaps you see.
Step Five: Let dry and enjoy. The mixture will start to deflate a week and a half as the air bubbles leave. You can touch up the pumpkin with more foam or you can wipe it off and start over again.
Source: DisneyParksBlog

