
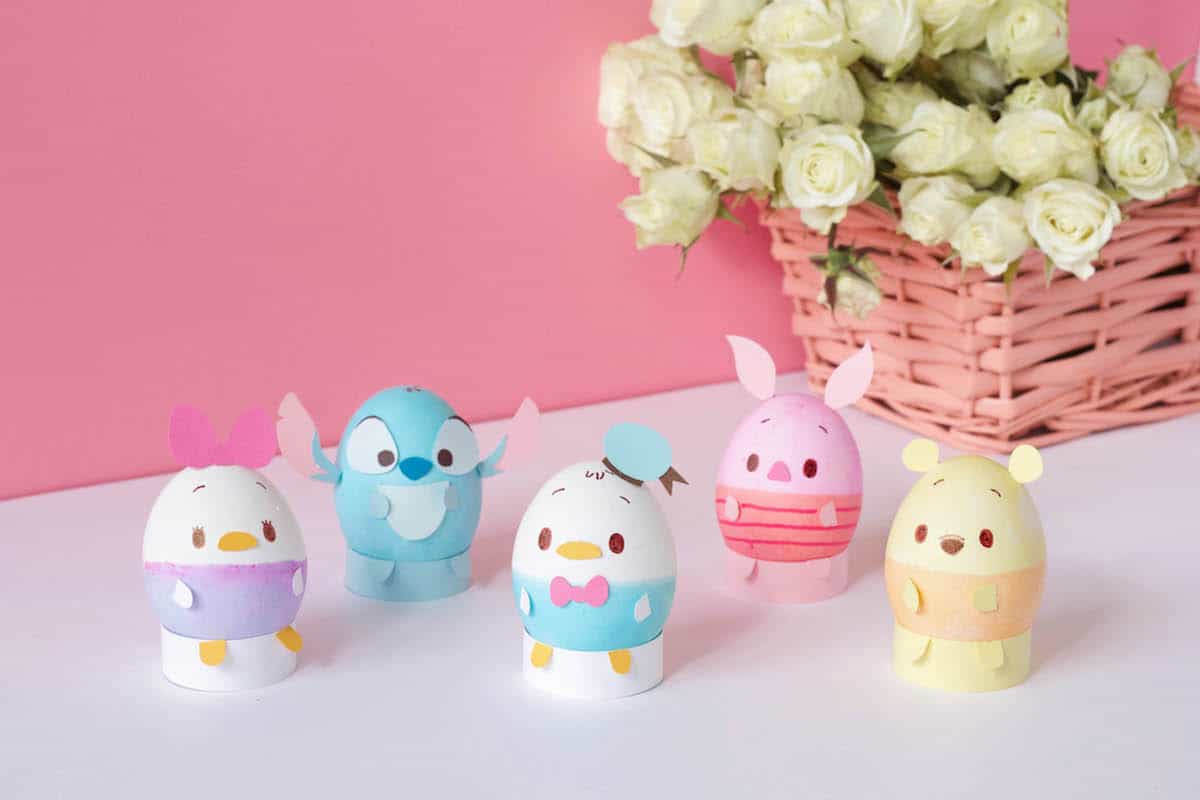
Get egg-cited! Let’s celebrate spring by turning Easter eggs into Ufufy! Using a dye kit and some construction paper, you can transform a plain white egg into your favorite Ufufy, complete with a base for display.
What You’ll Need
- -Colorful construction paper
- -Scissors
- -Large white eggs
- -Safety pin
- -Water
- -Food coloring
- -Vinegar
- -Hot glue
- -Brown and pink felt tip pens
How To Make It
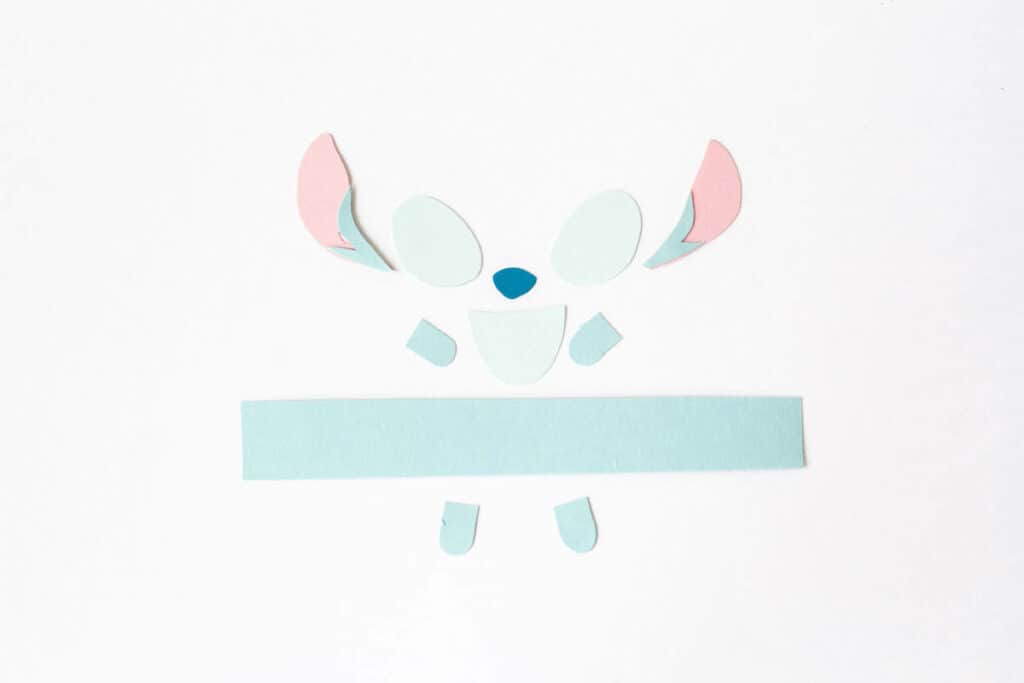
Start by cutting out your paper pieces. For Stitch you’ll need light blue, pale blue, pink, and blue. Cut out the following shapes from the light blue paper: 2 feet, 2 arms, pieces for the ears, and a rectangle for the base. From the pale blue, cut out his chest and his eyes. Cut out his nose from blue, and his ears from pink.
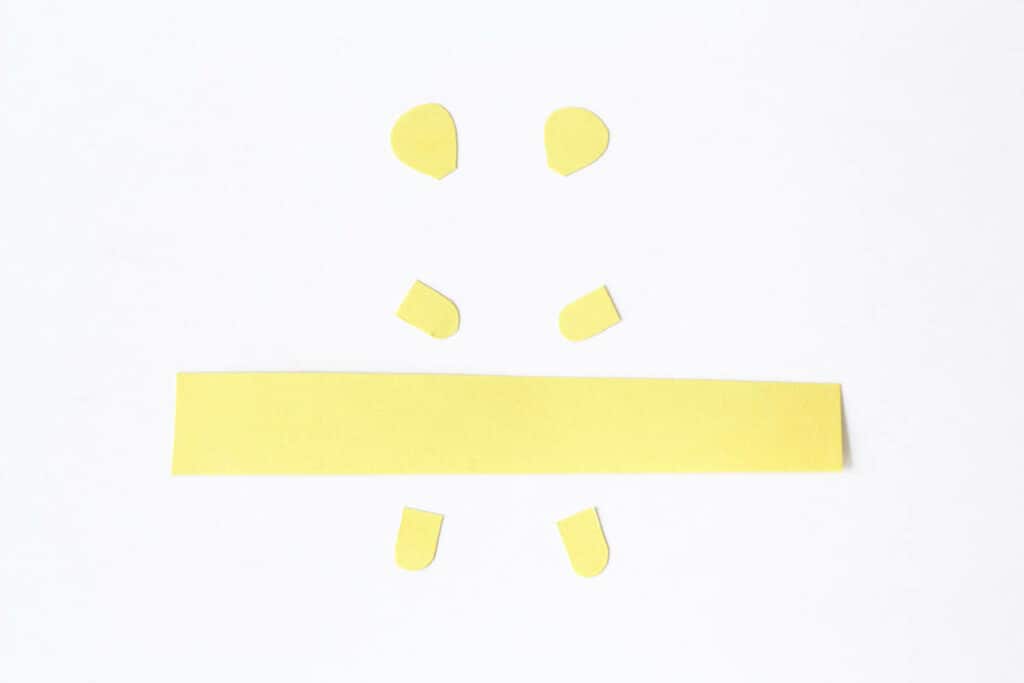
For Winnie the Pooh, cut out all pieces from light yellow. You’ll need 2 ears, 2 arms, 2 feet, and the base.
For Piglet, cut out 2 ears, 2 arms, 2 feet, and the base from light pink paper. Cut one his nose from darker pink paper.
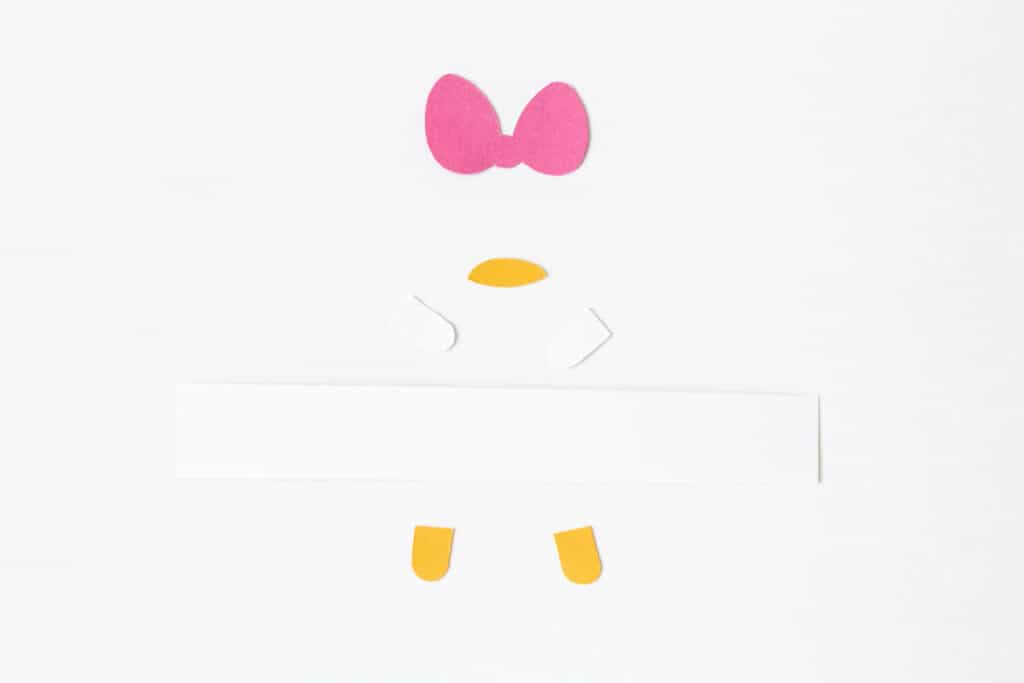
For Daisy, cut out 2 arms and a base from white paper, a nose and 2 feet from yellow, and her bow from pink.
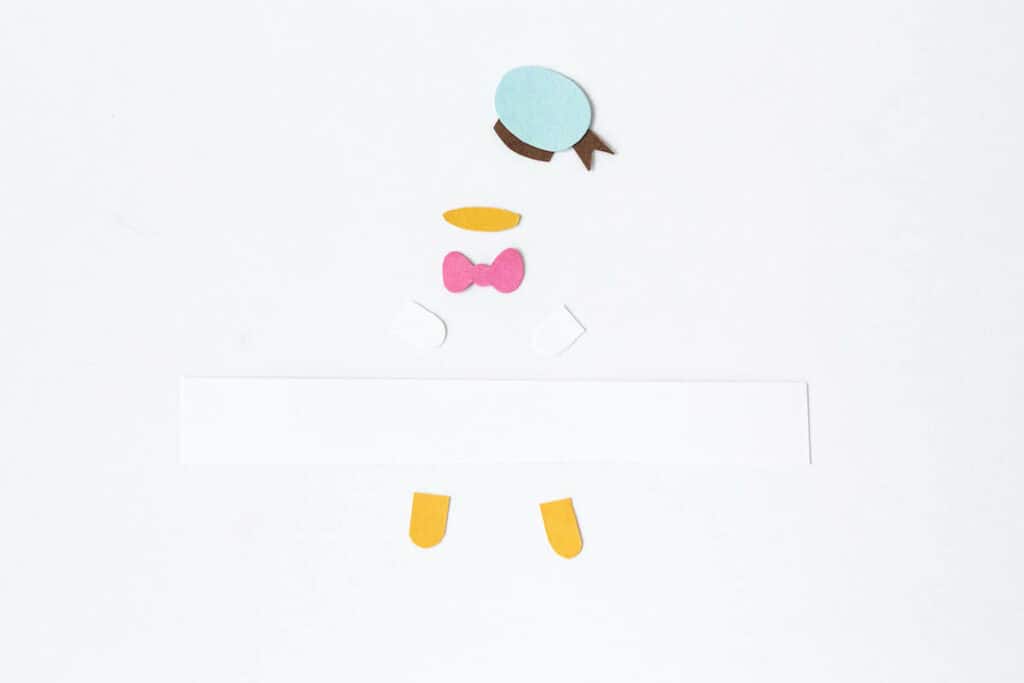
Finally, for Donald, cut out 2 arms and a base from white paper, a nose and 2 feet from yellow, a bow tie from pink, and his hat from brown and light blue.
Bonus Tip!
BONUS TIP: Consider planning and booking your next Disney trip with an Authorized Disney Vacation Planner you can trust like Mickey Travels. They’ll help you get the best Disney travel deal, share expert advice and their services are totally FREE! It’s genius! Discover More >
Next, either hard boil the eggs or hollow them. You can hollow them by poking a hole on each end of the egg with the safety pin (make the hole on the bottom larger than on top). Blow into the top hole to empty out the whites and yolk, then rinse the egg.
Prepare your dye kit. To make dye with food coloring, use 1/2 cup hot water, 1 teaspoon vinegar, and 15-20 drops of food coloring in a cup for each color. You’ll need pink, red, yellow, blue, and purple.
For Donald, just dip one of the eggs half way into the blue dye. For Daisy, dip her half the way into the purple dye. For Stitch, dye the whole egg blue. For Winnie the Pooh, dye the whole egg yellow, let it dry, then dip half into the red dye. For Piglet, dye the whole egg pink, let it dry, then dip half into the red dye. Let the eggs fully dry.
Wrap the paper bases around the eggs and tape the ends together. Glue all the feet onto their bases. Then glue the rest of the paper pieces to their corresponding eggs.
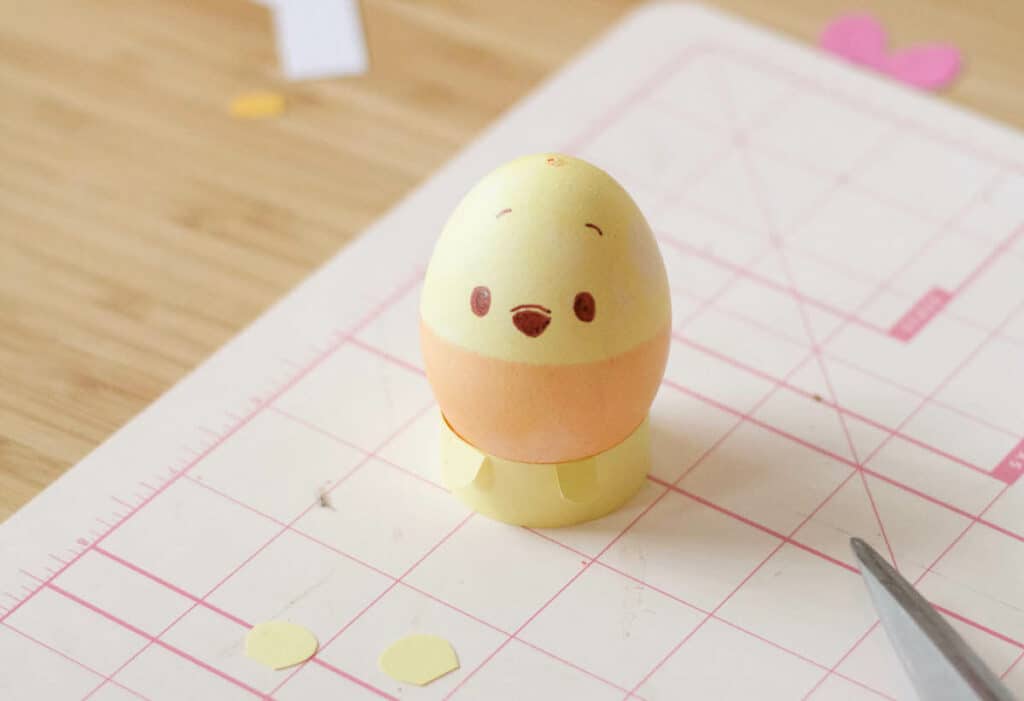
Use a brown pen to add details—hair, eyes, and eyebrows for Stitch; eyes and eyebrows for Piglet; eyes, nose, and eyebrows for Pooh; hair, eyebrows, and eyes for Donald; and eyes and eyebrows for Daisy.
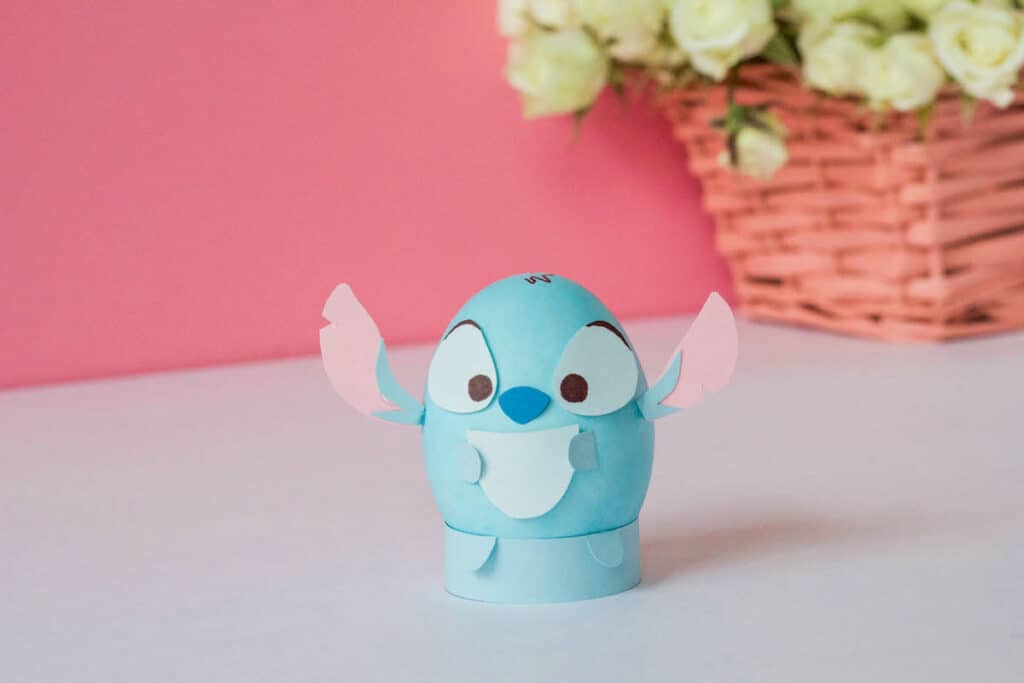
Finally, add 2 ear notches on Stitch, and dark pink lines on Piglet’s body.
Finally, place the eggs onto their bases.
You now have some adorable eggs featuring some Disney characters!
Source: DisneyFamily

